What Are LUTs? Guide to Colour Grading LUTs for Creators
Color is one of the most powerful storytelling tools in video, photography, and digital media. It sets the tone, evokes emotion, and defines the visual identity of a project. From dramatic thrillers to vibrant YouTube videos, the right color choices can make your content feel cinematic and professional.
But achieving consistent, visually appealing colors is not as simple as adjusting brightness and contrast. This is where Colour Grading LUTs come in — a professional tool for precise color grading and styling. Storyboarding tool can also help plan and visualize these color choices before shooting, making the final grading process smoother and more consistent.
Whether you are a beginner or a seasoned content creator, this guide will explain what LUTs are, how they work, their types, applications, and how to use them effectively. By the end, you will know exactly how to leverage colour grading LUTs to enhance your videos or photos.
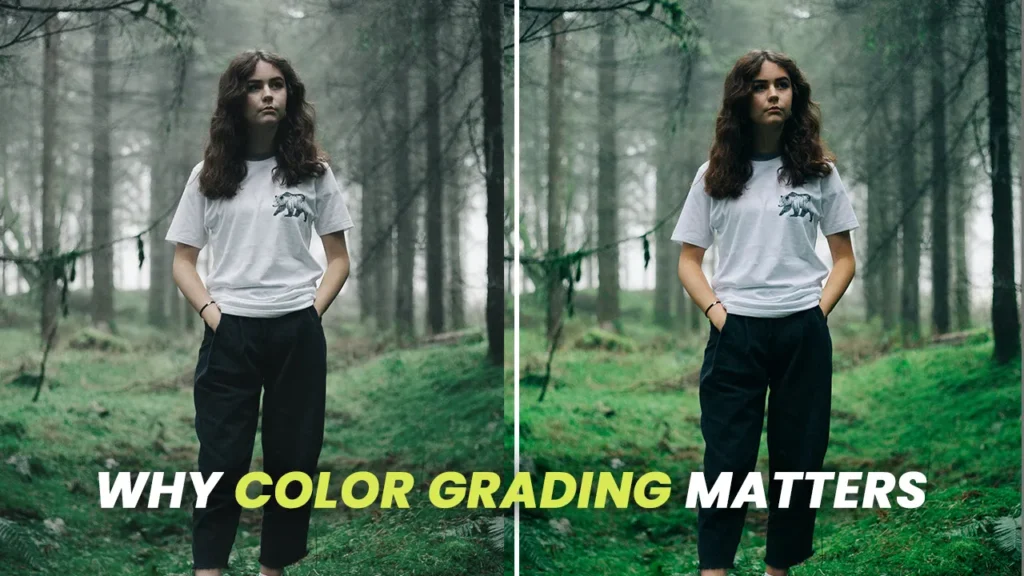
Why Color Grading Matters
Imagine two video clips with identical footage: same camera, same lighting, same scene. One looks flat, washed-out, and amateur. The other looks cinematic: rich in contrast, balanced skin tones, consistent mood, and style. That difference often comes down to colour grading LUTs.
Color is not just about pretty visuals—it sets the mood, enhances storytelling, and ensures that your visuals look polished and intentional. As defined, color grading is the post-production process of altering the appearance of an image or video.
Professionals spend hours fine-tuning the look of their footage. But for creators on tight schedules—YouTubers, small studio filmmakers, photographers—color grading LUTs offer a powerful shortcut: they give you consistent, stylized color with speed and control.
When you apply a well-designed LUT, you’re applying a pre-mapped color transformation: your footage goes from raw to refined. That’s why mastering color grading LUTs is essential if you want your videos or photos to compete in 2025’s visual marketplace.
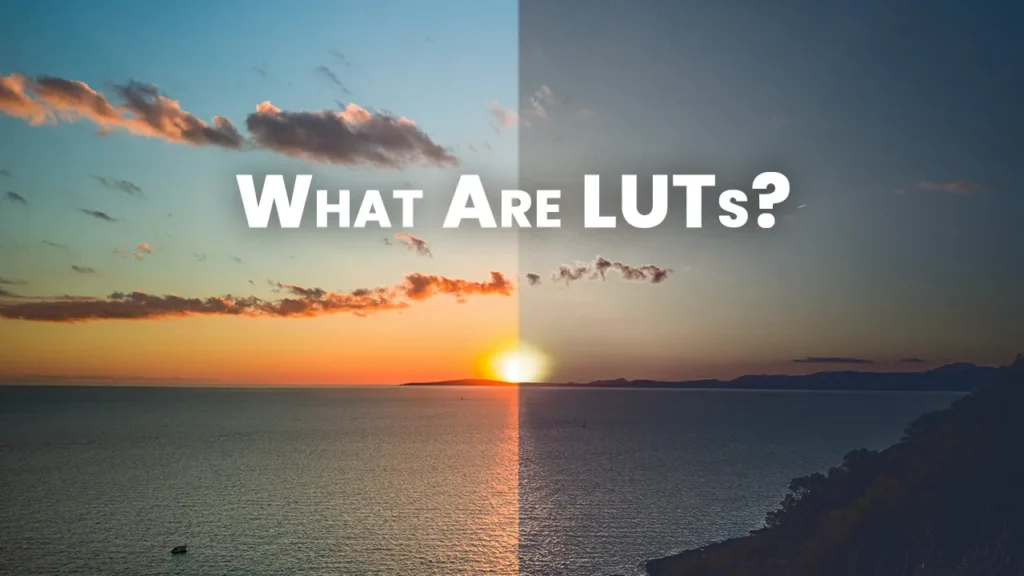
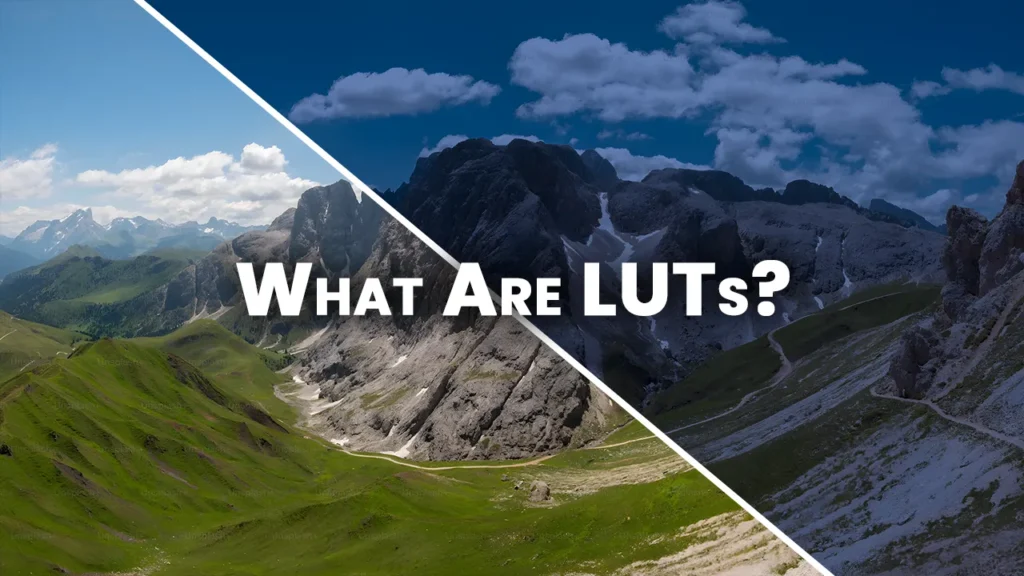
What Are LUTs?
A LUT, short for Look-Up Table, is a mathematical formula that converts one set of color values into another. Think of it as a professional color filter — but with far more control and accuracy. Unlike basic Instagram or phone filters, colour grading LUTs can adjust colors at the pixel level, preserving detail while creating a specific mood or tone.
In simpler terms, LUTs allow you to map the original colors of your footage or image to a new set of colors. This transformation can give your visuals a cinematic look, correct color inconsistencies, or unify shots from multiple cameras.
Analogy
Imagine you take a flat, midday video shot. By applying a cinematic LUT, you can instantly make it look like a warm sunset, a moody rainy evening, or a high-contrast action scene — without manually adjusting each color.
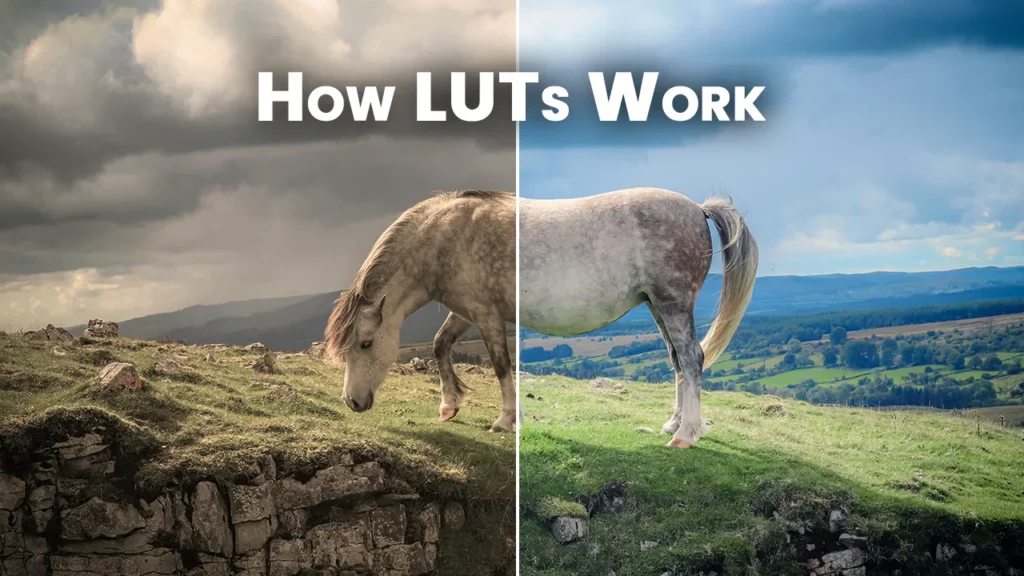
How LUTs Work
Understanding LUTs doesn’t require advanced technical knowledge. At their core, they remap the colors of your image.
Here’s how it works:
- Input Values – The original Red, Green, and Blue (RGB) color data of your image or video.
- Transformation – The LUT applies its formula, adjusting hue, saturation, and brightness based on a predefined mapping.
- Output Values – The resulting color values create the graded look or style.
For example, applying a teal-orange LUT for color grading to a neutral cityscape will shift shadows into blue tones and highlights into warm orange hues — giving a cinematic blockbuster feel.
This process works the same way whether you are editing in Adobe Premiere Pro, DaVinci Resolve, Final Cut Pro, or Photoshop.
Types of LUTs
LUTs come in two primary types: 1D LUTs and 3D LUTs. Each serves a different purpose in color grading LUTs workflows.
1D LUTs
- Adjust one color channel at a time (Red, Green, or Blue).
- Best for basic corrections, like adjusting brightness, contrast, or gamma.
- Faster to process and ideal for real-time previewing.
Example: Correcting overexposed footage or warming up skin tones.
3D LUTs
- Adjust all three color channels simultaneously in a 3D color cube.
- Ideal for creative grading, film emulation, and complex color transformations.
- Provides cinematic looks and stylized effects but requires more processing power.
Example: Turning a neutral daylight scene into a dramatic, moody night shot with rich blue shadows and vibrant highlights.
Quick Comparison
| Feature | 1D LUT | 3D LUT |
|---|---|---|
| Color Control | Individual RGB channels | All colors simultaneously |
| Complexity | Simple | Advanced |
| Use | Technical correction | Creative grading |
| Speed | Fast | Slightly slower |
| Best For | Real-time preview | Cinematic or stylized projects |
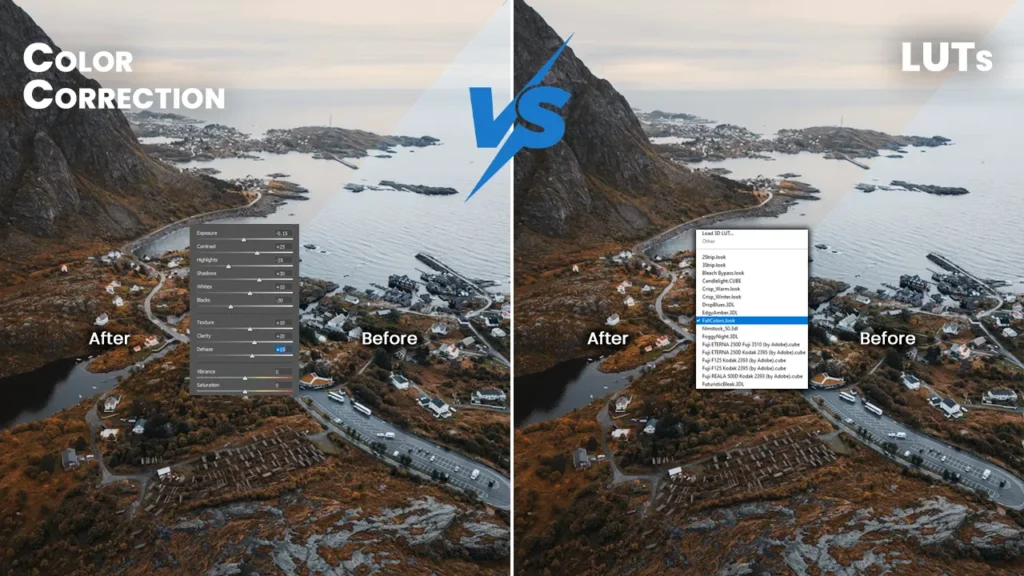
LUTs vs. Color Correction: Understanding the Difference
When working with videos or images, many beginners confuse color correction and color grading with LUTs. While both involve color, they serve different purposes in your workflow. Understanding the distinction is crucial for achieving professional-looking visuals.
Color Correction
Color correction is the first step in the color workflow. Its main goal is accuracy and consistency. Think of it as “fixing your footage” before adding style.
Key points:
- Objective: Correct technical issues and make the colors neutral.
- Focus: Exposure, white balance, brightness, contrast, shadows, highlights, and saturation.
- Goal: Ensure all shots match each other in terms of color and brightness, especially if they were shot under different lighting conditions or cameras.
- Tools used: Basic sliders in Premiere Pro, DaVinci Resolve, or Photoshop; scopes like histogram, waveform, and vectorscope.
Example: If one shot looks too blue because of fluorescent lighting, color correction balances it to match other shots.
Color Grading (LUTs)
Color grading comes after correction. Here, the goal is not technical accuracy, but creative storytelling and mood. LUTs (Look-Up Tables) are often used to simplify and speed up this process.
Key points:
- Objective: Apply a stylistic or cinematic look to footage.
- Focus: Hue shifts, shadows and highlights, overall tone, and mood.
- Goal: Give the project its unique visual identity — warm, cold, desaturated, high-contrast, or any cinematic look.
- Tools used: LUTs, curves, secondary color adjustments, color wheels, and grading panels.
Example: Adding a teal-orange cinematic LUT to a flat daylight shot to make it look like a blockbuster action scene.
Why the Order Matters
Applying LUTs before correcting footage can exaggerate mistakes. For instance:
- An overexposed shot may become too bright or washed out with a LUT.
- Inconsistent white balance across shots may produce unnatural colors after grading.
Correcting first and grading second ensures that LUTs apply their intended mood without technical issues interfering.
Comparison Table: Color Correction vs. LUTs (Color Grading)
| Feature | Color Correction | Color Grading (LUTs) |
|---|---|---|
| Purpose | Fix technical issues, achieve neutral and accurate colors | Add style, mood, and cinematic feel |
| When in Workflow | First | After color correction |
| Focus | Exposure, white balance, contrast, saturation, shadow/highlight balance | Hue shifts, tones, mood, cinematic style, creative LUT application |
| Goal | Consistency across shots | Emotional storytelling and visual identity |
| Tools | Color wheels, curves, scopes, sliders | LUTs, color grading panels, curves, secondary color adjustments |
| Impact on Footage | Neutralizes unwanted color casts and exposure issues | Creates artistic and cinematic looks |
| Example | Correct a fluorescent-lit interior to neutral daylight | Apply a teal-orange LUT for a dramatic cinematic effect |
| Recommended Tip | Always correct all shots first | Apply LUTs or creative grading after correction for best results |
Common Uses of LUTs
LUTs are versatile and used across multiple disciplines:
Filmmaking and Video Production
- Create cinematic looks.
- Match footage from multiple cameras.
- Stylize scenes (thrillers, romances, sci-fi, etc.).
YouTube and Social Media
- Maintain visual consistency across content.
- Apply popular cinematic LUTs for trending aesthetics.
- Save editing time with pre-made LUT packs.
Photography
- Apply LUTs to RAW images in Photoshop or Lightroom.
- Achieve film emulation looks for a photo series
Commercials and Branding
- Maintain consistent brand colors across ads.
- Use LUTs to give content a signature style.
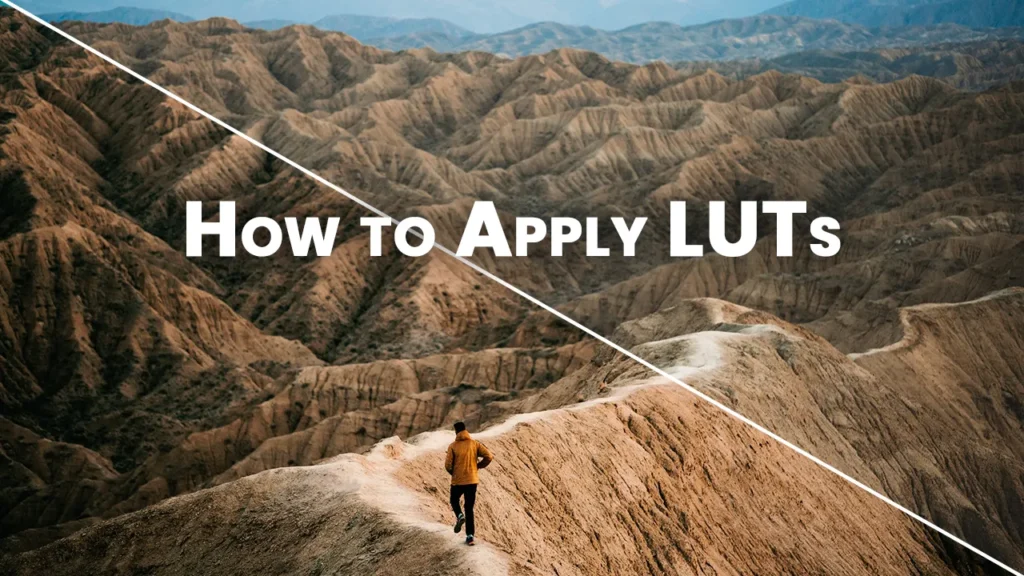
How to Apply LUTs
Here’s a beginner-friendly guide to using LUTs in popular software:
1. Adobe Premiere Pro
- Import footage.
- Go to Lumetri Color → Creative → Look.
- Select or import your LUT.
- Adjust Intensity for subtle or strong effects.
2. DaVinci Resolve
- Open the Color workspace.
- Right-click on a node → 3D LUT → Select LUT.
- Adjust Key Output for intensity.
3. Photoshop (for images)
- Open image → Adjustment Layer → Color Lookup.
- Select LUT (3DLUT, Cube, etc.) from options.
- Fine-tune opacity for the desired look.
4. Final Cut Pro
- Go to Effects → Color → Custom LUT.
- Drag the LUT onto the clip.
- Adjust intensity using the mix slider.
Tip: Always preview LUTs in multiple scenes, as different lighting conditions may require adjustments to the intensity.

Custom LUTs vs. Pre-Made LUTs: The Complete Guide
LUTs are powerful tools for color grading, but not all LUTs are created equal. Choosing the right type of LUT can dramatically impact your workflow, creativity, and final results. Broadly, LUTs fall into two categories: Custom LUTs and Pre-Made LUTs.
Let’s explore them in detail
1. Custom LUTs
Custom LUTs are created specifically for your project or scene. They are designed by colorists or filmmakers to achieve a unique look tailored to your footage, brand, or cinematic vision.
Key Characteristics:
- Fully personalized for specific footage or artistic style.
- Can address particular lighting conditions, camera profiles, or scene moods.
- Often used in high-budget productions, films, or commercial projects where consistency and uniqueness are essential.
Pros of Custom LUTs:
| Advantage | Description |
|---|---|
| Complete Creative Control | You can define exact tones, shadows, and highlights for your vision. |
| Unique Look | No one else has your LUT; perfect for branding or cinematic style. |
| Tailored for Specific Footage | Matches your camera, lighting, and environment perfectly. |
| Professional-Grade Results | Often used in feature films, commercials, or high-end content. |
Cons of Custom LUTs:
| Limitation | Description |
|---|---|
| Time-Consuming | Designing a LUT from scratch requires expertise and experimentation. |
| Requires Knowledge | You need an understanding of color grading principles. |
| Software-Dependent | Often requires advanced editing software like DaVinci Resolve or Adobe Premiere Pro. |
Example Use Case:
A filmmaker shoots a nighttime urban thriller. The lighting includes neon signs, streetlights, and interior tungsten lamps. A custom LUT can balance these colors while giving the scene a moody, cinematic tone — something pre-made LUTs may not achieve perfectly.
2. Pre-Made LUTs
Pre-Made LUTs are ready-to-use LUT files that come in packs. They’re designed for fast application and are ideal for beginners, content creators, and projects that require quick, visually appealing results.
Key Characteristics:
- Available as downloadable packs for free or paid.
- Include film emulations, cinematic looks, vlog styles, or Instagram-style LUTs.
- Easy to apply to images or video clips in most editing software.
Pros of Pre-Made LUTs:
| Advantage | Description |
|---|---|
| Quick to Use | Apply instantly without designing from scratch. |
| Beginner-Friendly | No deep color grading knowledge required. |
| Variety of Styles | Packs include cinematic, warm, cool, vintage, or modern looks. |
| Consistency Across Projects | Ideal for content creators wanting uniform style for branding. |
Cons of Pre-Made LUTs:
| Limitation | Description |
|---|---|
| Limited Customization | You may need to tweak intensity or secondary colors. |
| Not Unique | Other creators may use the same LUT. |
| May Not Fit All Footage | Lighting or camera differences may require adjustments. |
Example Use Case:
A YouTuber wants to give all their travel videos a consistent cinematic look. By applying a pre-made teal-orange LUT pack, they achieve the desired tone quickly, without manually adjusting color for each clip.
Custom vs Pre-Made LUTs: Side-by-Side Comparison
| Feature | Custom LUTs | Pre-Made LUTs |
|---|---|---|
| Creation | Made from scratch for your project | Ready-to-use, downloadable |
| Creative Control | Full | Limited |
| Time Required | High | Low |
| Skill Level | Advanced | Beginner-Friendly |
| Consistency | Perfect for single project | Good for multiple projects but shared by others |
| Use Case | Feature films, commercials, unique cinematic projects | YouTube, social media, travel vlogs, quick edits |
| Cost | High (if made by professional colorist) | Low to medium |
| Flexibility | Can be modified extensively | Modifiable to a degree (opacity, exposure tweaks) |
How Storyboarding Helps in Using LUTs
Storyboarding is a crucial pre-production step where filmmakers, content creators, and photographers plan their shots visually before shooting. While storyboards are typically associated with framing and scene planning, they also play an important role in color grading LUTs and overall post-production workflow.
Here’s how storyboarding can help when using luts for color grading:
1. Planning the Visual Mood
Online storyboard generators allow creators to define the color and mood of each scene ahead of time. By visualizing the lighting, time of day, and emotional tone, you can choose appropriate colour grading LUTs that match the intended style. For example, a storyboard showing a warm sunset scene may call for a cinematic LUT with orange and teal tones.
2. Consistency Across Scenes
When working on multi-scene projects, consistency is key. Storyboarding helps plan which LUTs for color grading will be applied to maintain a uniform visual style throughout the video or film. This reduces post-production adjustments and ensures a professional, cohesive look.
3. Faster Post-Production Workflow
Having a storyboard with color references or notes allows editors to apply color grading LUTs quickly. Knowing which LUT will fit each scene in advance saves time and avoids trial-and-error adjustments, especially on tight deadlines.
4. Testing LUTs Before Shooting
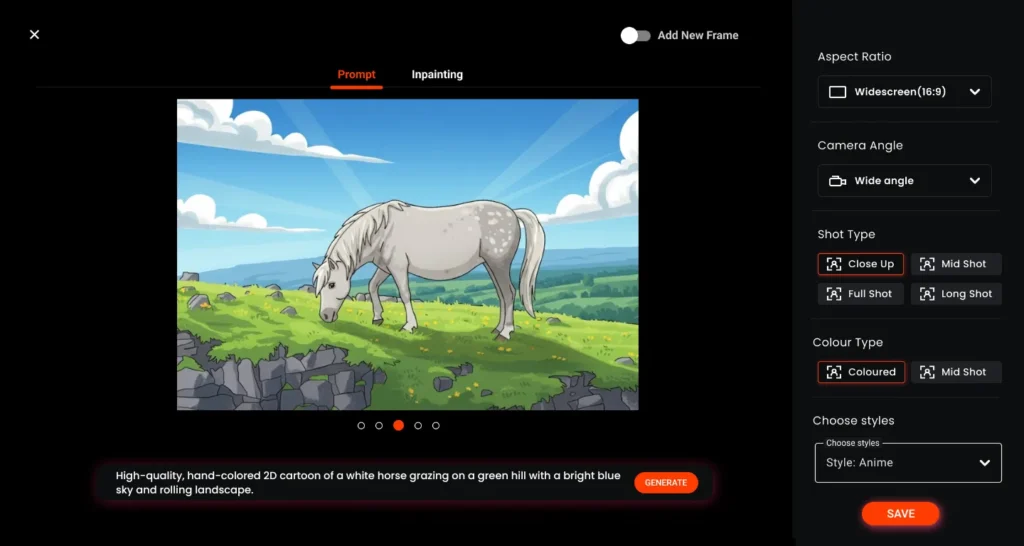
Some digital storyboard platforms, like Murphy, let creators apply LUTs for color grading directly on storyboard frames. This preview helps filmmakers see how the footage will look with the LUT applied, making it easier to adjust lighting or framing before the actual shoot.
5. Enhancing Storytelling Through Color
Color is a storytelling tool. Storyboarding helps plan where certain moods or emotions should be emphasized. Using the right colour grading LUTs on planned scenes ensures that the final video evokes the desired audience response, from suspenseful tension to warm, happy moments.
Summary Table:
| Storyboarding Benefit | How It Helps with LUTs |
|---|---|
| Planning Mood | Select LUTs that match the emotional tone of each scene |
| Consistency | Maintain uniform colour grading LUTs across multiple scenes |
| Post-Production Speed | Apply LUTs faster with pre-planned shots |
| Pre-Visual Testing | Preview LUTs digitally before actual shooting |
| Storytelling | Use color creatively to enhance narrative impact |
In short, storyboarding bridges the gap between planning and post-production, making luts for color grading more effective and helping creators achieve cinematic, consistent visuals with less effort.
Best Practices for Using LUTs
- Correct Color First: Fix white balance and exposure before grading.
- Use Subtle Intensity: Avoid extreme saturation or contrast that looks unnatural.
- Test Across Scenes: LUTs may react differently under various lighting.
- Maintain Consistency: Use the same LUT for an entire project for a cohesive look.
- Combine LUTs Carefully: You can blend LUTs, but avoid overcomplication.
Advanced Tips
- Split LUT Application: Apply separate LUTs for shadows, midtones, and highlights.
- Layer LUTs: Use one LUT for style and another for technical adjustments.
- Storytelling with LUTs: Warm tones for happy moments, cool tones for suspense, desaturated LUTs for tense drama.
- Preserve Skin Tones: Always check the LUT effect on human subjects; skin should feel natural.
LUTs in Modern Production Workflows
LUTs are used from pre-production to post-production:
- Pre-Production: Preview mood and tone using LUT-applied frames or references.
- On Set: Load LUTs into camera monitors to visualize the final look in real time.
- Post-Production: Apply LUTs for creative grading and finalize the cinematic style.
Even platforms like Murphy, a digital storyboard tool, allow creators to preview LUTs applied to frames, bridging the gap between previsualization and final grading.
Popular LUT Types
- Cinematic LUTs: Emulate blockbuster looks (teal-orange, noir).
- Film Emulation LUTs: Reproduce classic film stocks (Kodak, Fuji).
- Vlog LUTs: Quick, visually appealing colors for social media.
- Creative LUTs: Stylized tones for specific moods or brands.
Conclusion
LUTs are essential tools for both beginners and professionals. They allow you to:
- Transform footage with cinematic style.
- Maintain consistency across multiple shots and cameras.
- Save time during color grading.
- Experiment with visual storytelling without complex adjustments.
Remember: correct first, grade second, and test LUTs across scenes. Whether you are a filmmaker, content creator, or photographer, understanding LUTs will elevate your work and make your visuals more compelling.
Platforms like Murphy can enhance this process, but the real power of LUTs lies in learning how to apply, adjust, and creatively experiment.
Colour Grading LUTs FAQs for Filmmakers and Creators
1. What are LUTs in video editing?
LUTs, or Look-Up Tables, are mathematical formulas that transform colors in your footage or images. They are commonly used as color grading LUTs to give videos a cinematic, polished look. Using LUTs for color grading helps maintain visual consistency and enhances storytelling in filmmaking, YouTube videos, or social media content.
2. What is the difference between 1D LUTs and 3D LUTs?
1D LUTs adjust individual RGB channels and are perfect for basic corrections like brightness and contrast. 3D LUTs adjust all color channels simultaneously, allowing complex, creative transformations. Both types of LUTs are essential LUTs for color grading, depending on whether you need technical accuracy or cinematic styling.
3. Can beginners use LUTs for color grading?
Yes! Beginners can use pre-made colour grading LUTs to achieve professional-looking, cinematic results without advanced knowledge. Software like Adobe Premiere Pro, DaVinci Resolve, Final Cut Pro, and Photoshop makes it easy to apply LUTs for color grading with a few clicks.
4. What is the difference between color correction and LUTs for color grading?
Color correction fixes technical issues such as exposure, white balance, and contrast, ensuring footage looks accurate. LUTs, or color grading LUTs, are applied after correction to stylize footage, shift tones, and create a cinematic mood. For best results, always correct first and then apply LUTs for color grading.
5. Can LUTs be customized?
Absolutely. Custom LUTs for color grading can be designed to match a specific scene, camera profile, or visual style. Custom LUTs provide full creative control for filmmakers and photographers, while pre-made LUTs save time and are great for social media creators or YouTubers who need consistent visuals.
6. Which software supports LUTs?
Most professional editing software supports color grading LUTs, including:
- Adobe Premiere Pro
- DaVinci Resolve
- Final Cut Pro
- Photoshop
These platforms allow creators to import, apply, and adjust LUTs for color grading quickly and efficiently.
7. Are LUTs only for films and videos?
No. Colour grading LUTs are widely used in photography, commercials, branding, and social media content to maintain a consistent color style and create a professional cinematic look across all visuals.
8. How do LUTs affect skin tones?
LUTs can impact skin tones if applied incorrectly. Always preview your color grading LUTs on human subjects and adjust intensity to keep skin tones natural while enhancing the overall cinematic style.
9. Can LUTs be layered or combined?
Yes. Creators can layer LUTs for color grading to separate technical correction from creative stylization. For example, one LUT can adjust exposure and white balance, while another adds a cinematic tone or mood.
10. Why are LUTs important for YouTube and social media creators?
Using color grading LUTs helps content creators maintain a consistent visual style, save editing time, and produce cinematic-quality videos. This makes content more engaging and professional, which is essential for growing audiences on platforms like YouTube, Instagram, and TikTok.
11.What are the benefits of using LUTs in filmmaking?
LUTs for color grading simplify the color workflow, save editing time, and ensure that your footage has a consistent cinematic look. They allow filmmakers to experiment with moods, lighting, and storytelling styles while keeping visuals professional.
12. How do LUTs help with multi-camera shoots?
Colour grading LUTs unify footage from multiple cameras with different color profiles, ensuring that all shots match seamlessly. This is essential for professional filmmaking, vlogs, or branded content.
13. Are LUTs only for digital videos, or can they be used for photos?
LUTs can also be applied to still images. Color grading LUTs in Photoshop or Lightroom help photographers emulate film styles, adjust tones, and maintain a consistent aesthetic across photo series or portfolios.
14. What types of LUTs are available?
Popular LUTs for color grading include:
- Cinematic LUTs (teal-orange, noir)
- Film emulation LUTs (Kodak, Fuji)
- Social media LUTs (Instagram, YouTube styles)
- Creative LUTs (mood-based or brand-specific looks)
15. How do I choose the right LUT for my project?
The right LUT depends on your project’s style, lighting, and mood. Beginners can start with pre-made color grading LUTs, while professionals may create custom LUTs for color grading to achieve a unique cinematic look. Always test LUTs on different scenes to ensure consistency.